.svg)
Jira Software and adam.ai integration
Table of Content
Why Connect adam.ai to Jira Software?
How to Connect Jira Software to Your adam.ai Account as an Admin/Owner
How to Connect Jira Software to Your adam.ai Account as a Member
How to Configure Jira Software in Your adam.ai Account
How to Link an Action to Jira Project
How to Disconnect Jira Software
Why Connect adam.ai to Jira Software?
Before, during, or after a meeting, send the actions you take on adam.ai to your/your team's Jira project so that you/your team can take it from there.
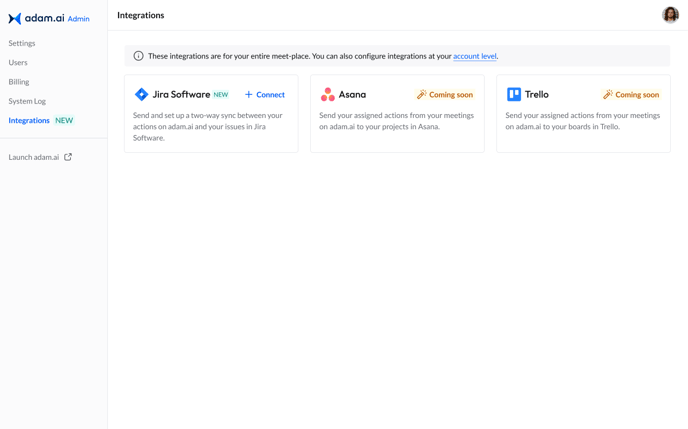
How to Connect Jira Software to Your adam.ai Account as an Admin/Owner
- Click on your profile icon on the top right and choose "Admin Portal" from the dropdown list.
- From the admin portal page, choose "Integrations" from the side menu on the left.
- Click “+ Connect” on the Jira Software card.
You’ll be requested by Atlassian to sign in to have access to your Jira Software account. When you click “Accept,” you’ll see that Jira Software is now successfully connected and ready to be used.
How to Connect Jira Software to Your Account as a Member
- Click on the Marketplace icon
 on the side menu on the bottom left.
 - Find the Jira Software card under the “Project Management” category or type “Jira” in the search bar.
- Click “Contact owner” on the Jira Software card.
- A window will appear to fill out an email request for Jira integration to the account owner.
- Click "Submit."
- Once your account owner accepts your request, you will be able to authorize your account.
Once Jira is connected by the account owner, you can authorize your account to Jira:
- Click on the Marketplace icon on the side menu on the bottom left.
- Find the Jira Software card under the “Project Management” category or type “Jira” in the search bar.
- Click “Authorize your account” on the Jira Software card.
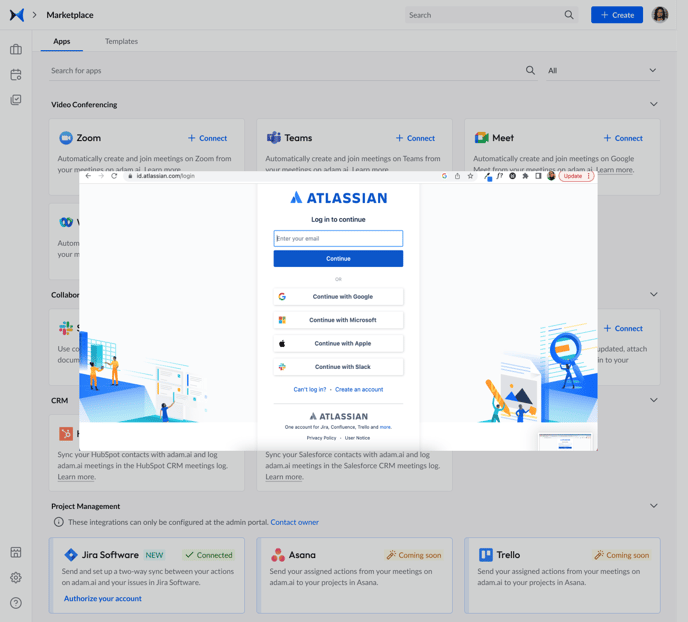
You’ll be requested by Atlassian to sign in and authorize adam.ai to have access to your Jira Software account. When you click “Accept,” you’ll see that Jira Software is now successfully connected and ready to be used.
How to Configure Jira Software in Your adam.ai Account
- Click on your profile icon on the top right and choose "Admin Portal" from the dropdown list.
- Click on "Integrations" on the side menu on the left.
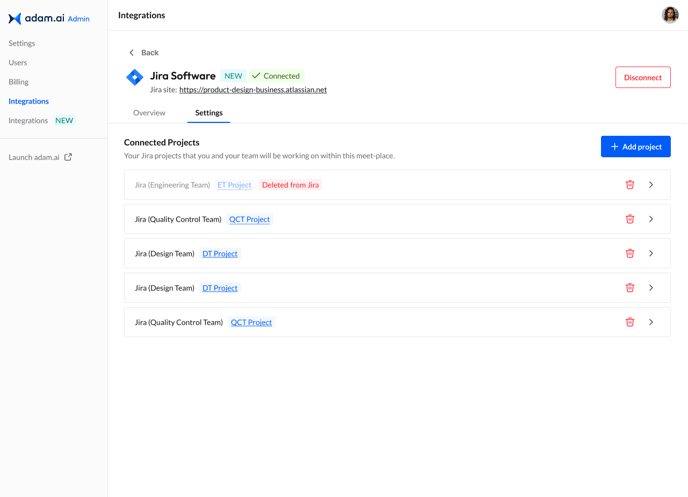
- Choose the Jira Software card and click on "Settings."
- You can add/delete Jira projects that you and your team will be working on.
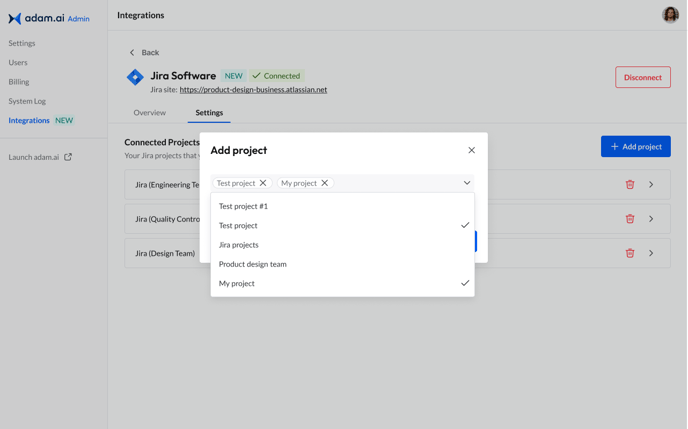
- Click on each project to view its details.
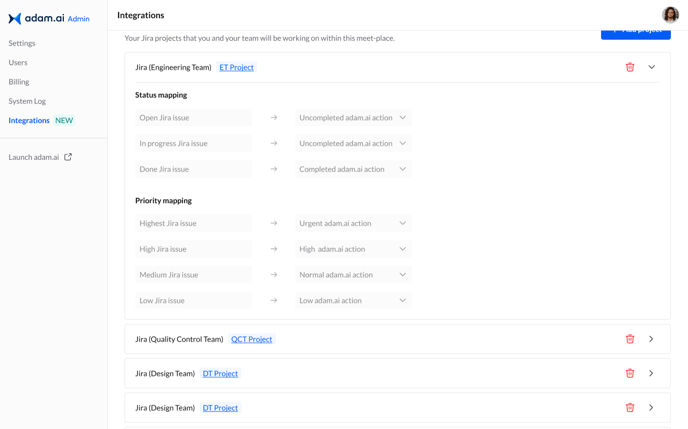
- If you delete a project on Jira, all linked actions to that project will stay the same on adam.ai but will be unlinked from Jira.
How to Link an Action to a Jira Project
Before, during, or after a meeting, link the actions you take to your Jira project to work on the issues there.
- Open the options menu of an action.
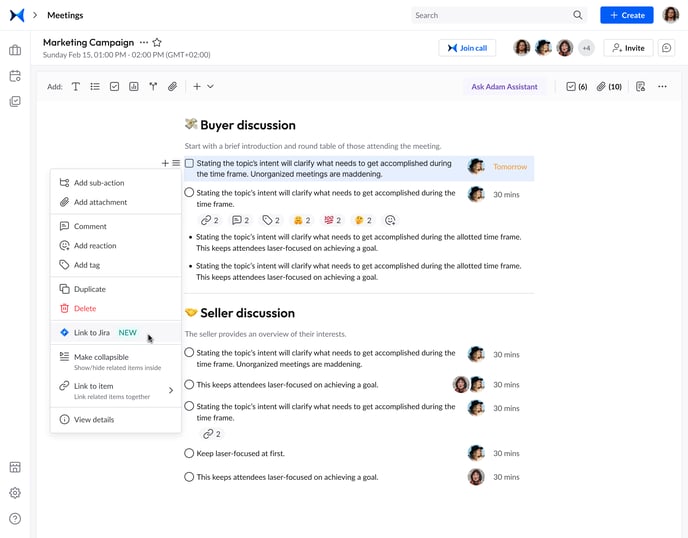
- Click "Link to Jira."
- Select a project and an issue type.
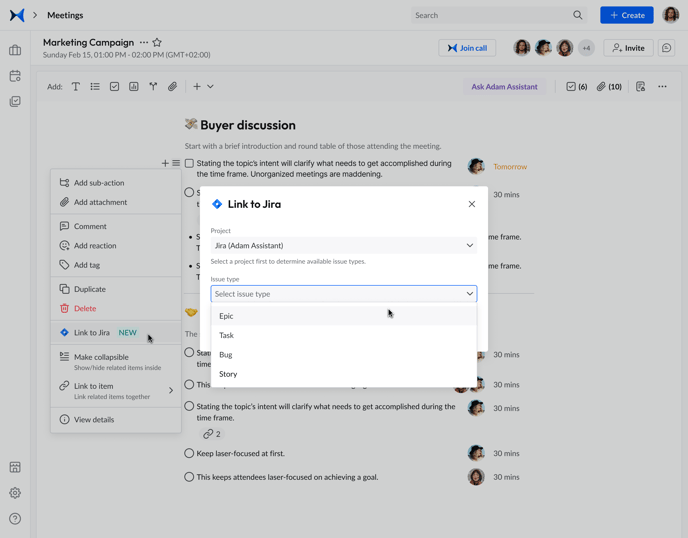
- Link item.
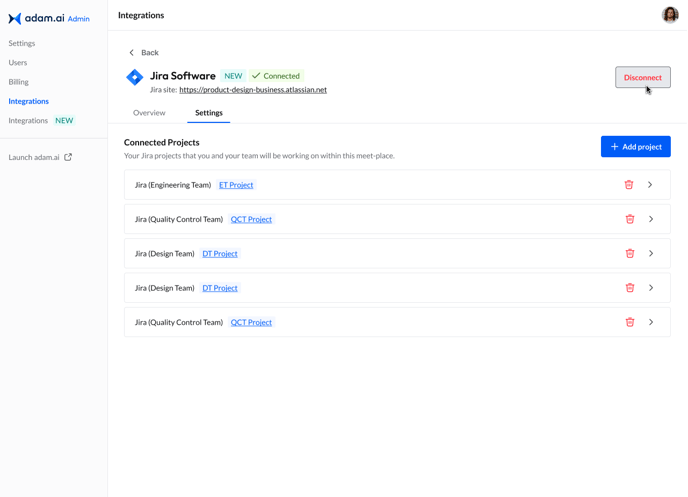
How to Disconnect Jira Software
Disconnecting Jira Software will unlink all actions on adam.ai from Jira. Yet, all actions and issues are safe on either platform.
- Click on Integrations in the Admin portal on the side menu on the left.
- Click on the Jira Software card and then "Disconnect."