.svg)
Your interface has a dedicated “Actions” section, where you can view and manage all actions across all meetings. You can access it by clicking on ![]() on the side menu on the left.
on the side menu on the left.
Remember, only the action creators can assign and delete the actions, while both action creators and assignees can edit the actions’ info and view all actions that were created during meetings they attended or were invited to.
Meeting participants who weren’t assigned a specific action can only add comments to it.
Table of Content
How to Mark an Action as Complete
How to Manage the Assignees of an Action
How to Manage the Due Date of an Action
How to Manage the Priority of an Action
How to Edit the Description of an Action
How to View and Add Sub-Actions to a Main Action
How to View and Add Attachments to an Action
How to Link Actions to Other Content Items
How to Link an Action to Jira Project
How to Tag a Content Item in an Action
How to Manage Notifications for Actions
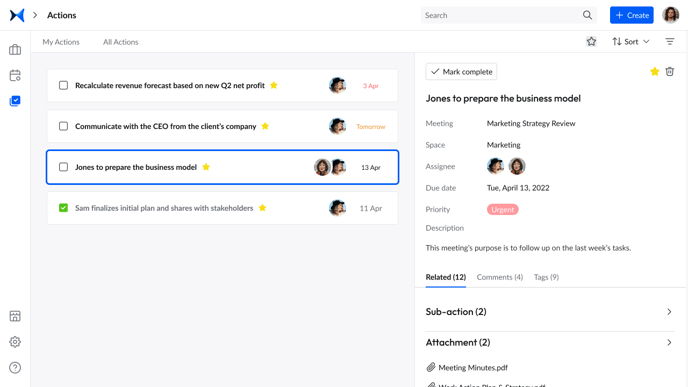
How to View Actions
- Click on
 on the side menu on the left to open the "Actions" page.
 - The "My Actions" tab shows the actions assigned to you.
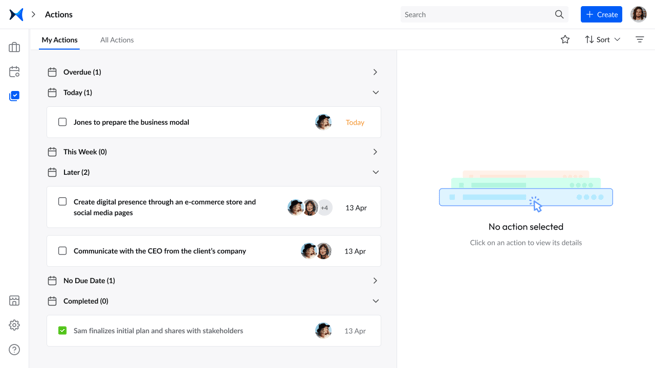
- The "All actions" tab shows all actions created (by you or others) during any meetings you attended or were invited to.
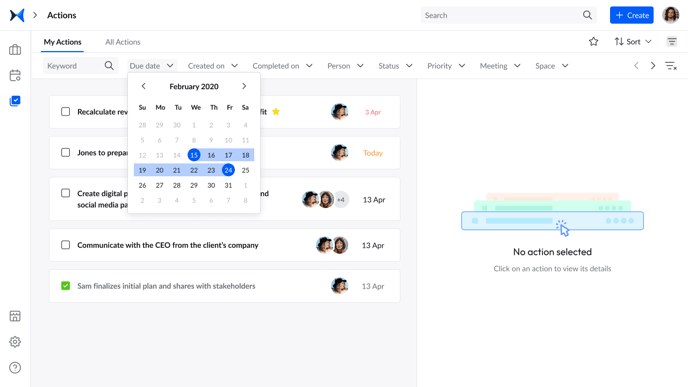
Other Ways to View Actions
1. Search for any action in any meeting: Go to "My Actions" or "All Actions." Click on ![]() on the top right to search for a specific action using a keyword, due date, status, priority, and others.
on the top right to search for a specific action using a keyword, due date, status, priority, and others.
2. View starred actions: Click on the star symbol on the top right to see all your starred actions.
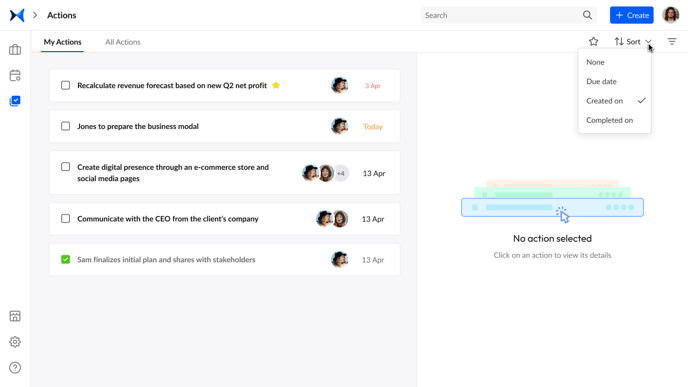
3. Sort actions: Click on ![]() in the top right to sort actions according to “Due date, ”Created on,” or “Completed on.”
in the top right to sort actions according to “Due date, ”Created on,” or “Completed on.”
How to Mark an Action as Complete
-
Click on
on the side menu on the left to open the "Actions" page. -
Choose the action you want to mark as complete.
-
Click on the small box next to the action's name. The box will turn green with a check mark in the middle to mark the action as complete.
Alternatively:
- Choose the action you want to mark as complete from the "Actions" page.
- Click on the action card. Its details will open on the left.
- Click on "Mark complete" at the top to mark the action as complete.
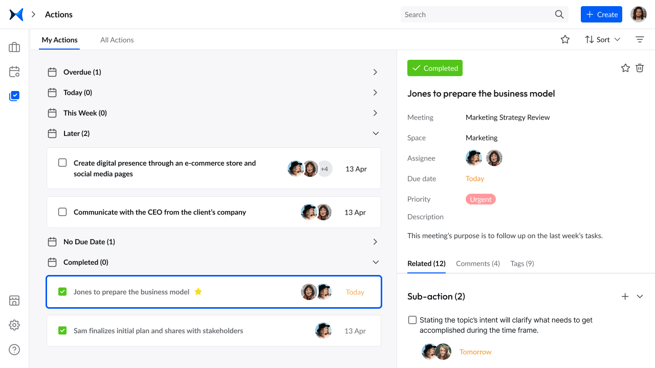
Note: You can “mark complete” only the actions you created or were assigned to you.
How to Manage the Assignees of an Action
- Click on on the side menu on the left to open the "Actions" page.
- Click on the action you want to edit to open its details.
- Click on the plus sign next to "Assignee" to add people.
Note: You can add/remove assignees only in the actions you created or assigned to you.
How to Manage the Due Date of an Action
- Click on on the side menu on the left to open the "Actions" page.
- Click on the action you want to edit to open its details.
- Choose a preferred date in “Due date."
Note: You can change the due date only in the actions you created or assigned to you.
How to Manage the Priority of an Action
- Click on on the side menu on the left to open the "Actions" page.
- Click on the action you want to edit to open its details.
- Choose a priority level in "Priority."
Note: You can add/change the priority only in the actions you created or assigned to you.
How to Edit the Description of an Action
- Click on on the side menu on the left to open the "Actions" page.
- Click on the action you want to edit to open its details.
- Click “Add description” and start editing.
Note: You can edit the description only in the actions you created or assigned to you.
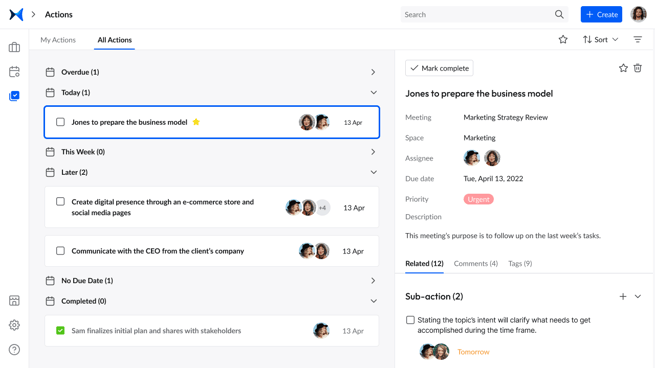
How to View and Add Sub-Actions to a Main Action
- Click on on the side menu on the left to open the "Actions" page.
- Click on the action you want to edit to open its details.
- You can view the sub-actions under the "Related" tab.
- To add a new sub-action, click on the plus sign on the right.
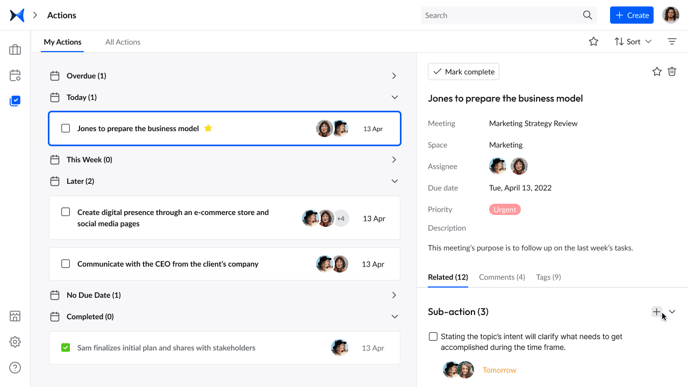
Notes:
- The sub-action has the same features as the main action (i.e., adding assignees, due dates, attachments, etc.).
- You can add sub-actions only to the actions you created or assigned to you.
How to View and Add Attachments to an Action
- Click on on the side menu on the left to open the "Actions" page.
- Click on an action to open its details.
- You can view previous attachments under the “Attachments” section in the “Related" tab.
- To add an attachment, click on the plus sign on the right. You can add attachments from your device, Google Drive, Dropbox, or OneDrive.
- Click on the added attachment to download it and access its features: linked items, comments, and tags.
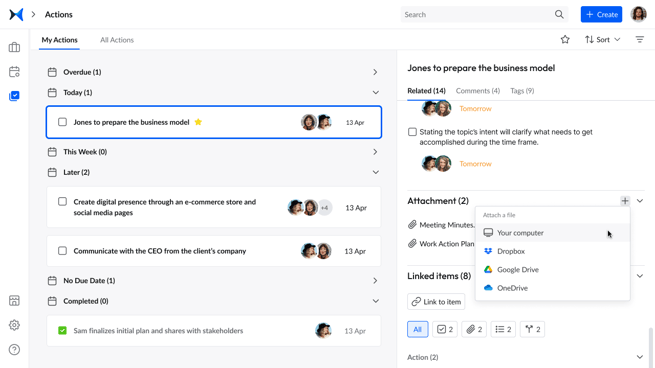
Note: You can add attachments only to the actions you created or assigned to you.
How to Link Actions to Other Content Items
- Click on on the side menu on the left to open the "Actions" page.
- Click on an action to open its details.
- Click on the “Related” tab and find the "Linked items" section
- Click "Link to item" to link your action to any content item (i.e., agenda item, pole, decision, note, etc.)
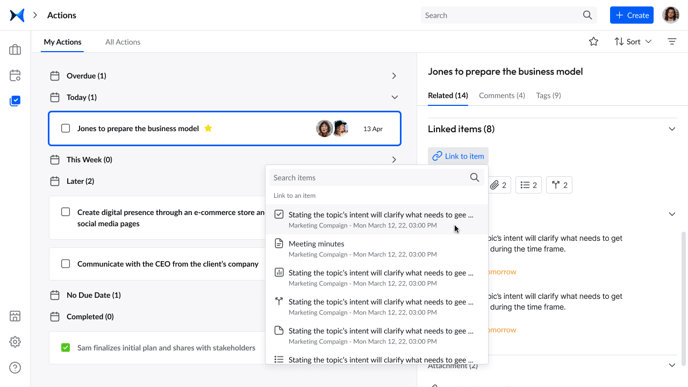
Note: You can link items only to the actions you created or assigned to you.
How to Link an Action to Jira Project
Before, during, or after a meeting, link the actions you take to your Jira project to work on the issues there.
- Open the options menu of an action.
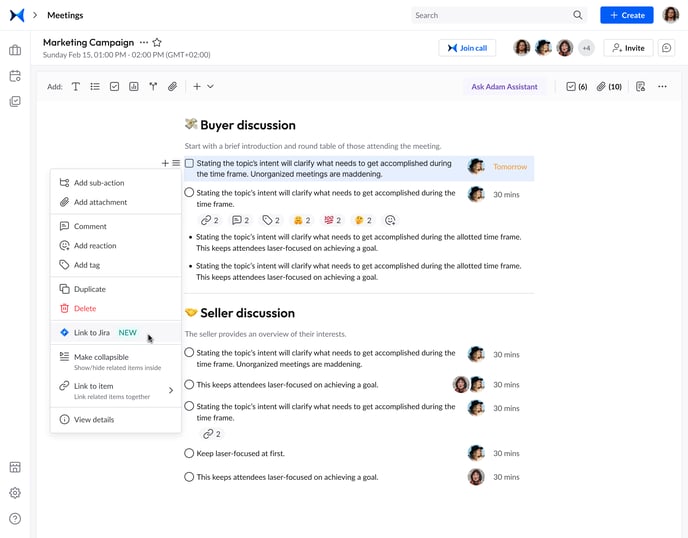
- Click "Link to Jira."
- Select a project and an issue type.
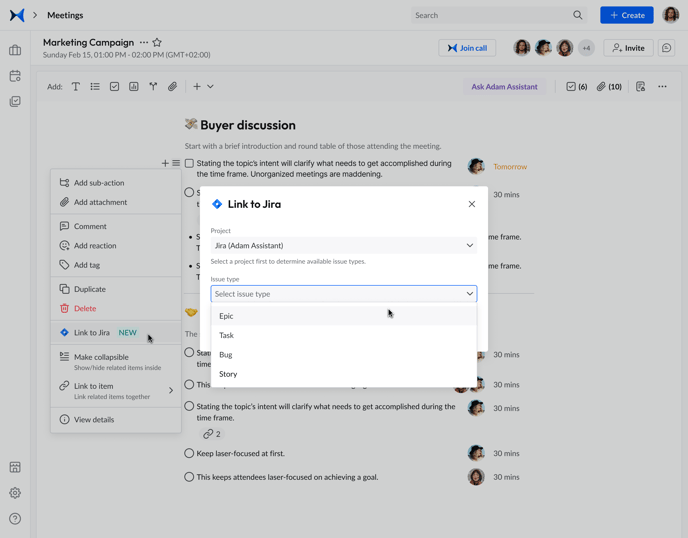
- Link item.
Notice the issue ID beneath the action item and on the side item details.
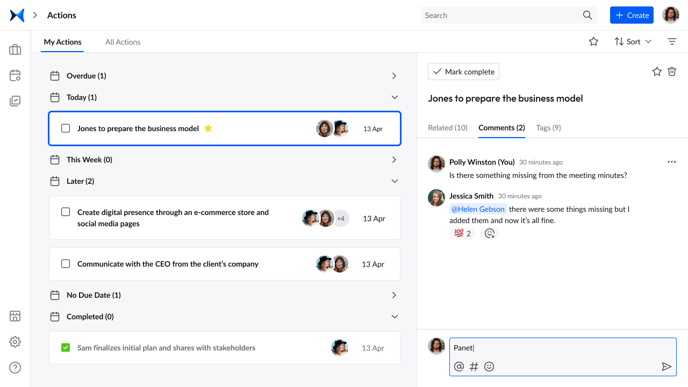
How to Comment on an Action
- Click on on the side menu on the left to open the "Actions" page.
- Click on the action you want to comment on to open its details.
- Click on the "Comment" tab to type a new comment and type @ to mention attendees.
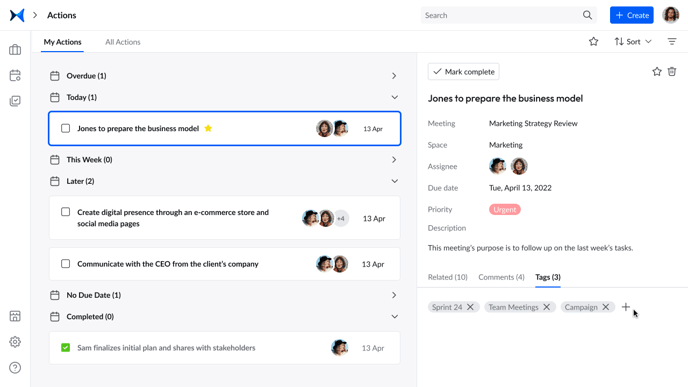
How to Tag a Content Item in an Action
- Click on on the side menu on the left to open the "Actions" page.
- Click on the action you want to edit to open its details.
- Click on the "Tags" tab to tag a content item.
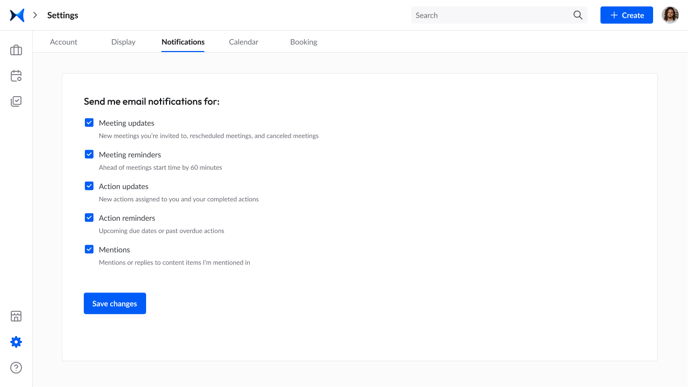
How to Manage Notifications for Actions
- Click on the gear symbol on the side menu on the left.
- Click on the “Notifications” tab.
- Mark/unmark “Action updates” or “Action reminders” according to your preference.
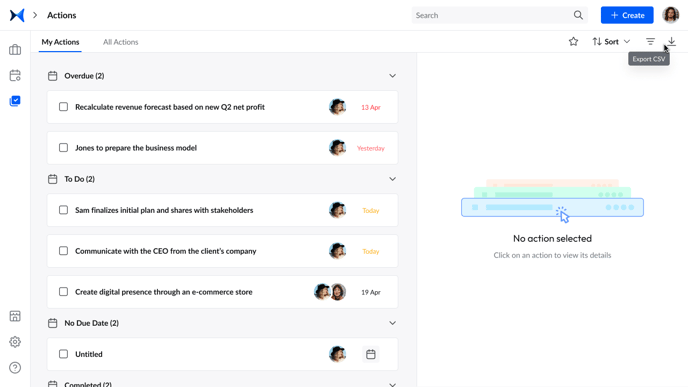
How to Download Actions
Click on the download button  in the top right to export actions via csv file.