.svg)
Table of Content
How to Find the Meeting Recording
How to Manually Upload Single/Multiple Meeting Records
How to Automatically Upload Meeting Recordings from Zoom or Teams to adam.ai
How to Find the Meeting Recording
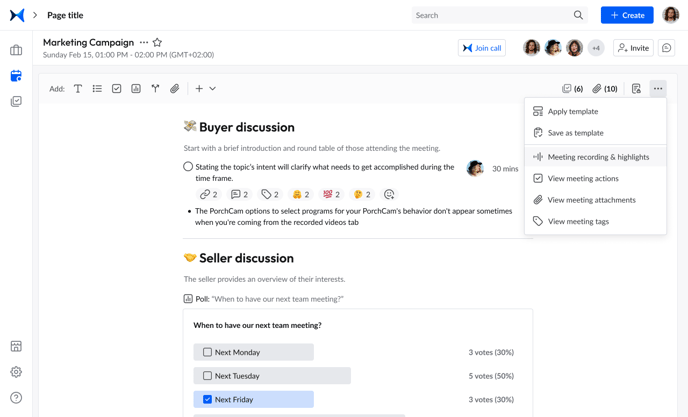
- After the meeting ends, click on the ellipsis at the upper right of your content space.
- Choose "Meeting recording & highlights" from the dropdown list.
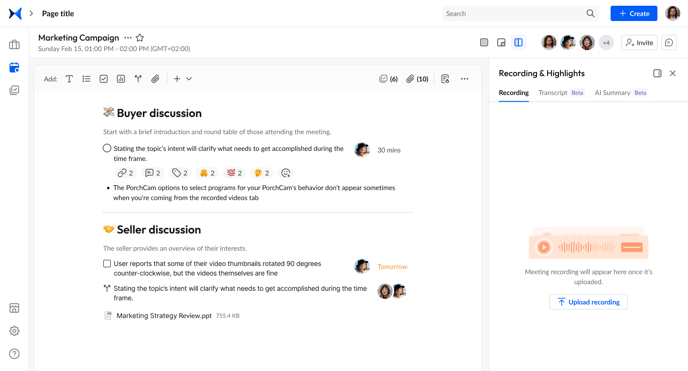
- If you used adam.ai as your video call tool when creating your meeting, you'll find the recording uploaded automatically.
Note: After the meeting recording is uploaded, you can access its details, where you're able to link it to any content item or add comments or tags.
How to Manually Upload Single/Multiple Meeting Recordings
- After the meeting ends, click on the ellipsis at the upper right of your content space.
- Choose "Meeting recording & highlights" from the dropdown list.
- Click "Upload recording" to upload your Zoom, Teams, or Google Meet recording(s).
How to Automatically Upload Meeting Recordings from Zoom or Teams to adam.ai
To have your recordings automatically uploaded, you'll first need to configure Zoom or Teams.
- Click on
 on the side menu on the left.
 - Locate the Zoom or Teams card under the “Video Conferencing” category or search for Zoom in the search bar.
- Click on the ellipsis on the card and choose "Configure."
- Check the box in front of "Automatically add recording in meeting room after the meeting ends" and click "Save changes."

- Create your meeting and choose Zoom or Teams as your video call tool.
- After the meeting ends, click on the ellipsis at the upper right of your content space.
- Choose "Meeting recording & highlights" from the dropdown list.
- You'll find your meeting recording ready and uploaded.
Note: This option isn't available for Google Meet.