.svg)
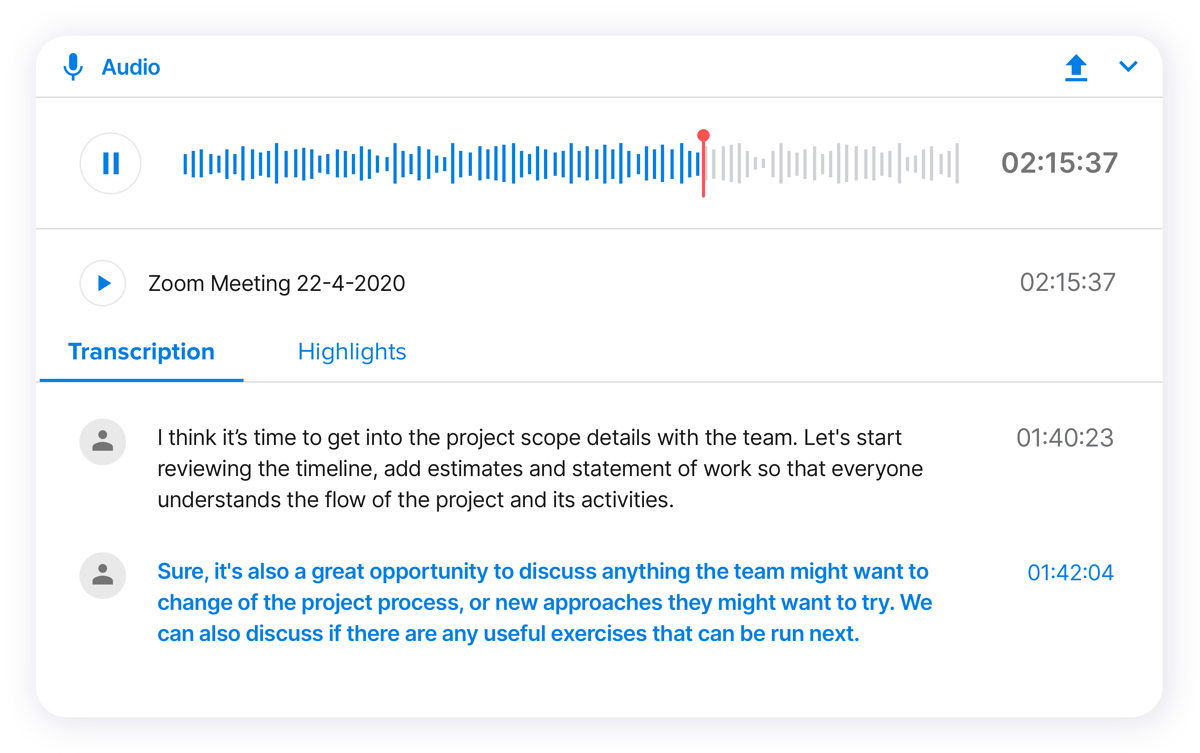
Receive a written record of your meetings and intelligently summarize important conversations between attendees as taken actions, decisions, or notes.
Note: This feature is available on the Enterprise plan only.
How to transcribe your audio?
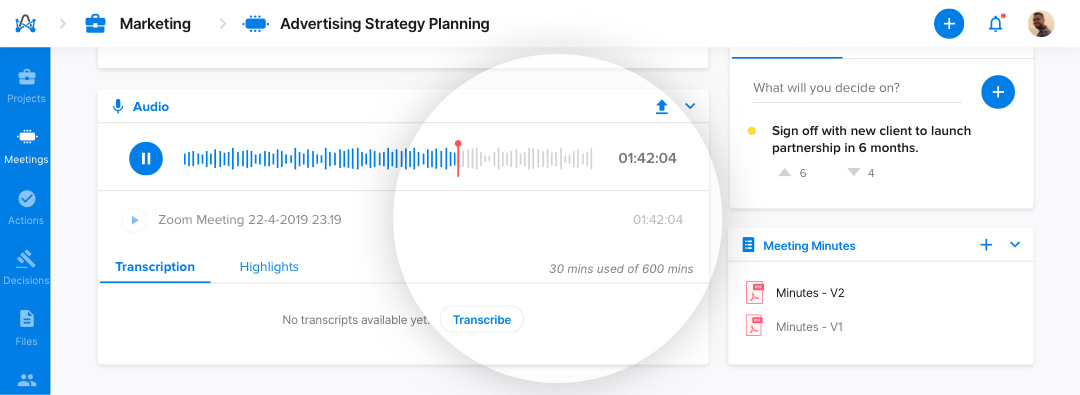
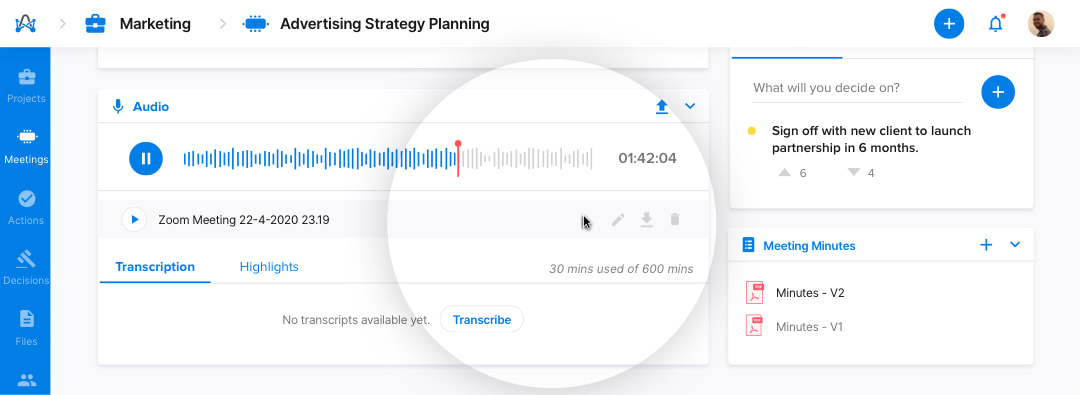
From the meeting room, head to the media tile and select upload to start uploading your audio files.
Adam Tip: If you are a Zoom pro user and you are recording your meetings on the cloud, your audio will automatically be attached to your media tile in your meeting room.
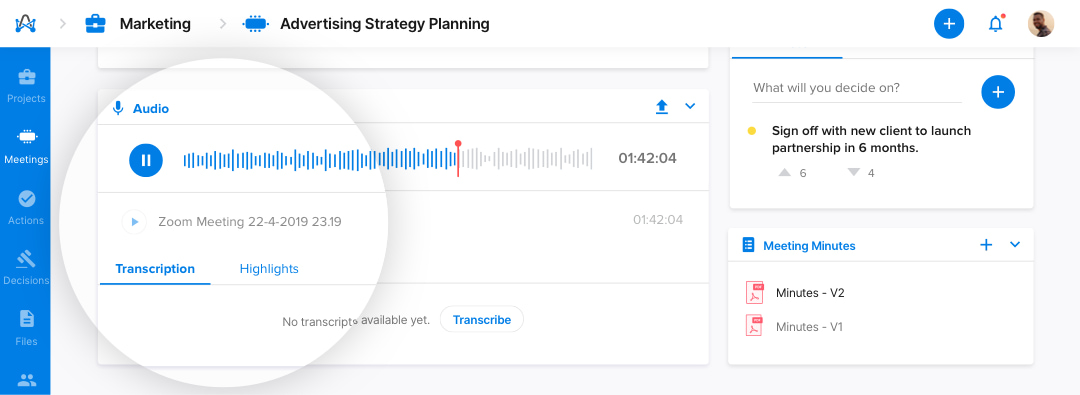
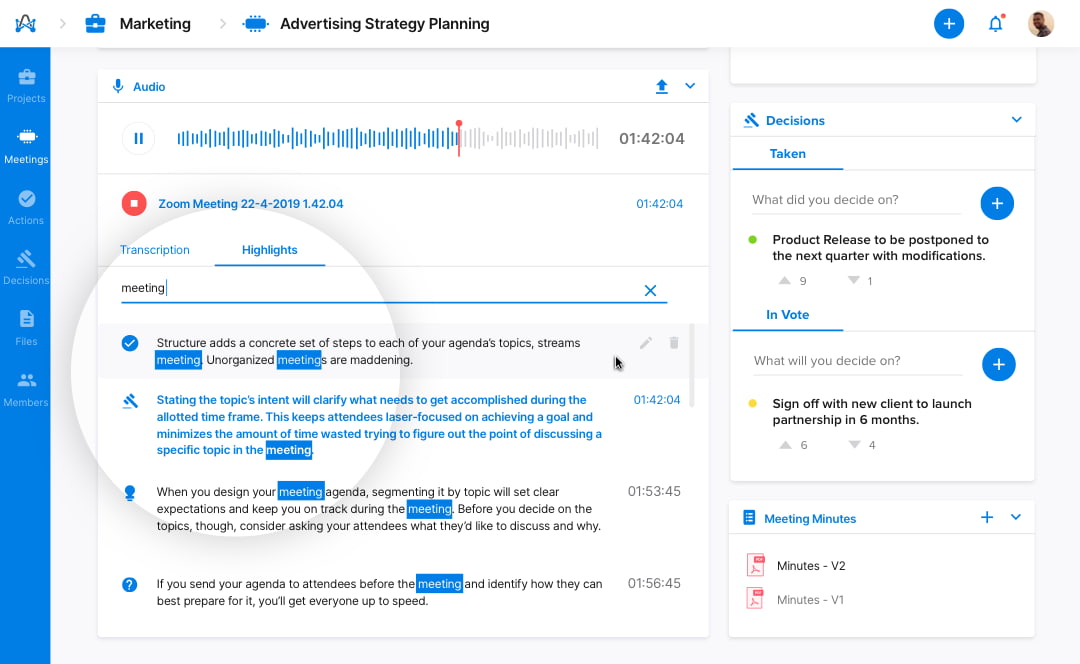
Once you upload your audio, transcription and highlights tabs will appear where the meeting coordinator can:
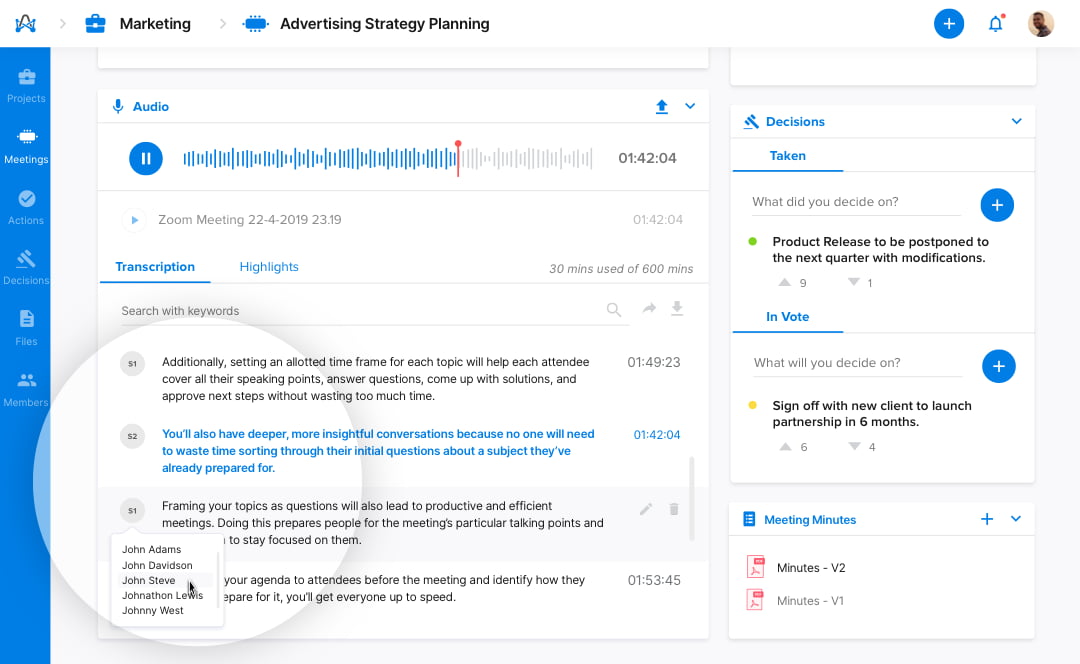
1. Set and identify speakers from the meeting attendees.
2. Share audio transcription to other collaboration tools like Slack or Microsoft Teams. Select your 'Team' and 'Channel' to directly share audio to Slack and Microsoft Teams channels.
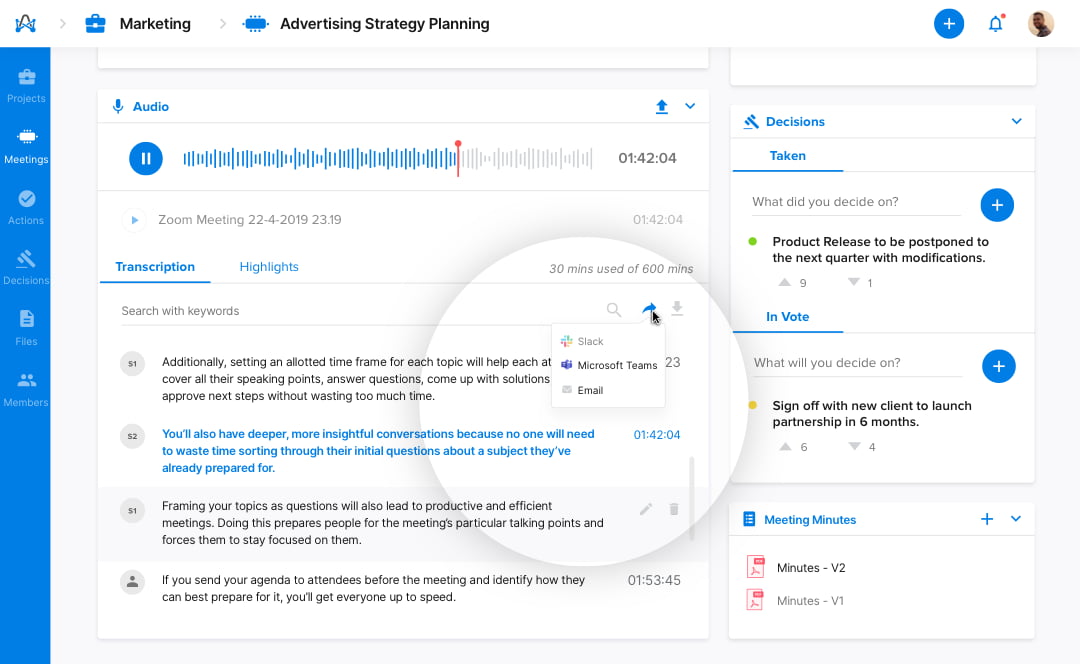
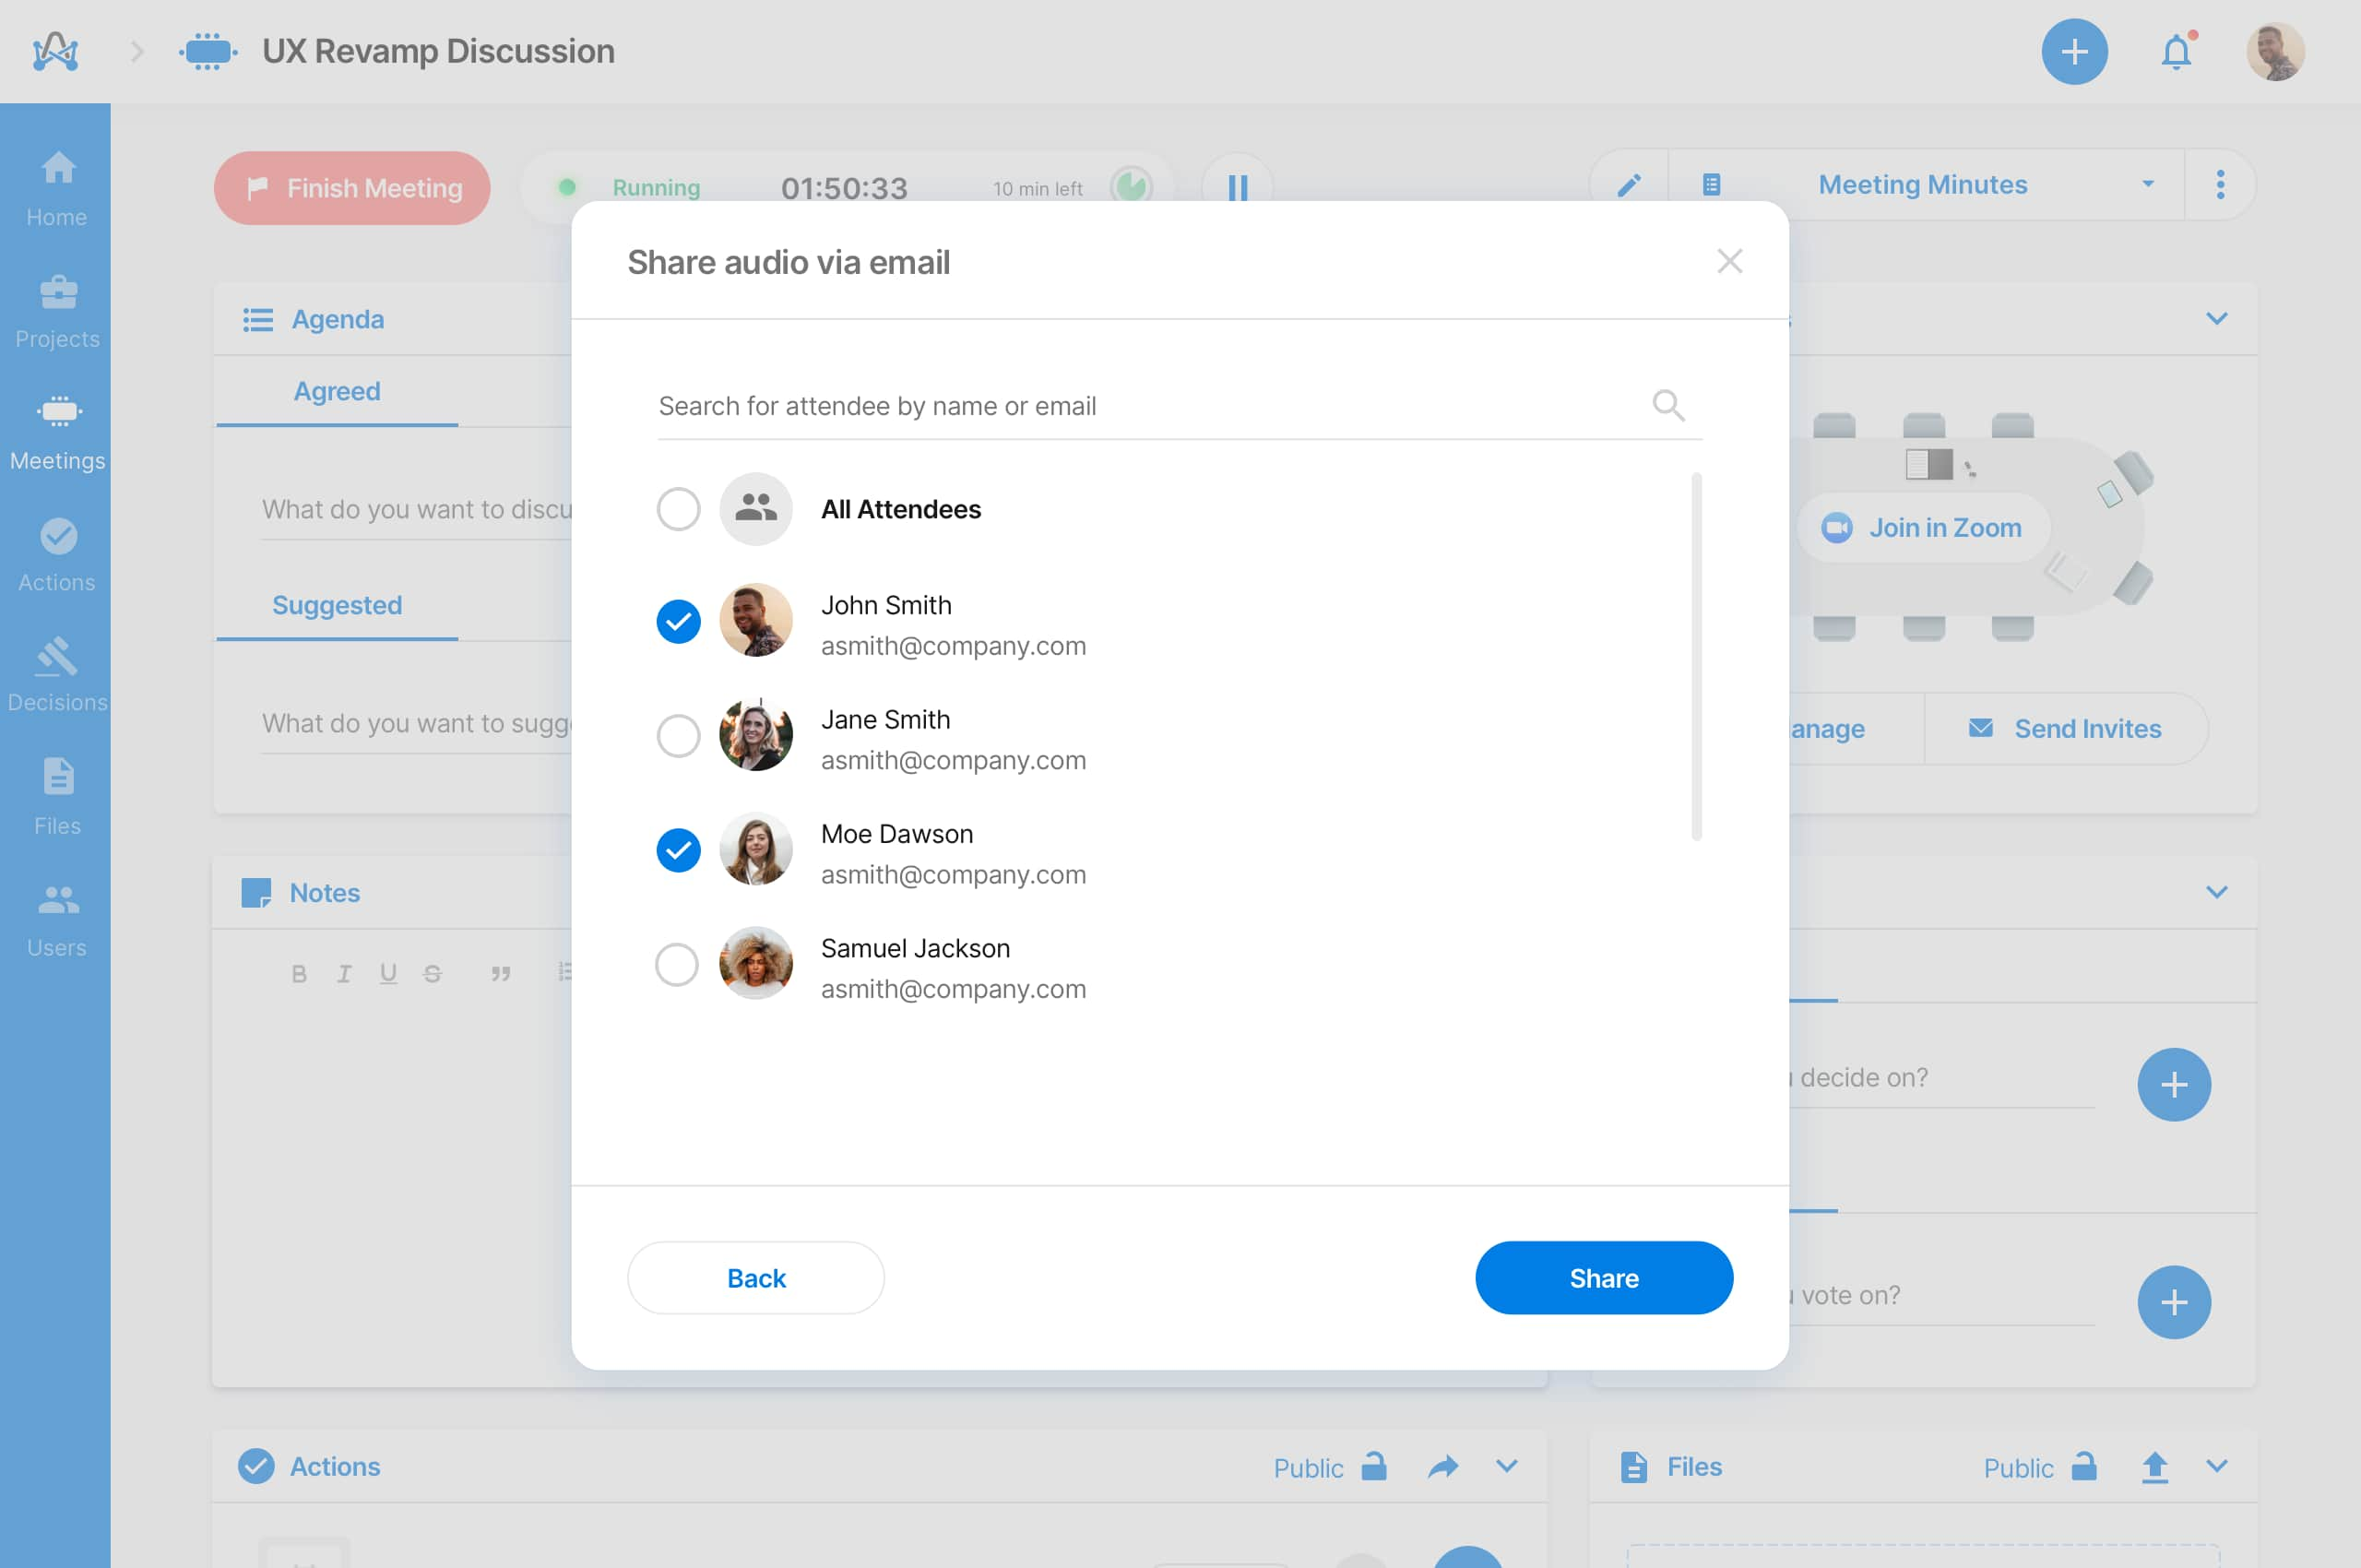
You can also share the audio file to meeting attendees via email by clicking 'Share' on the top right of the tile.
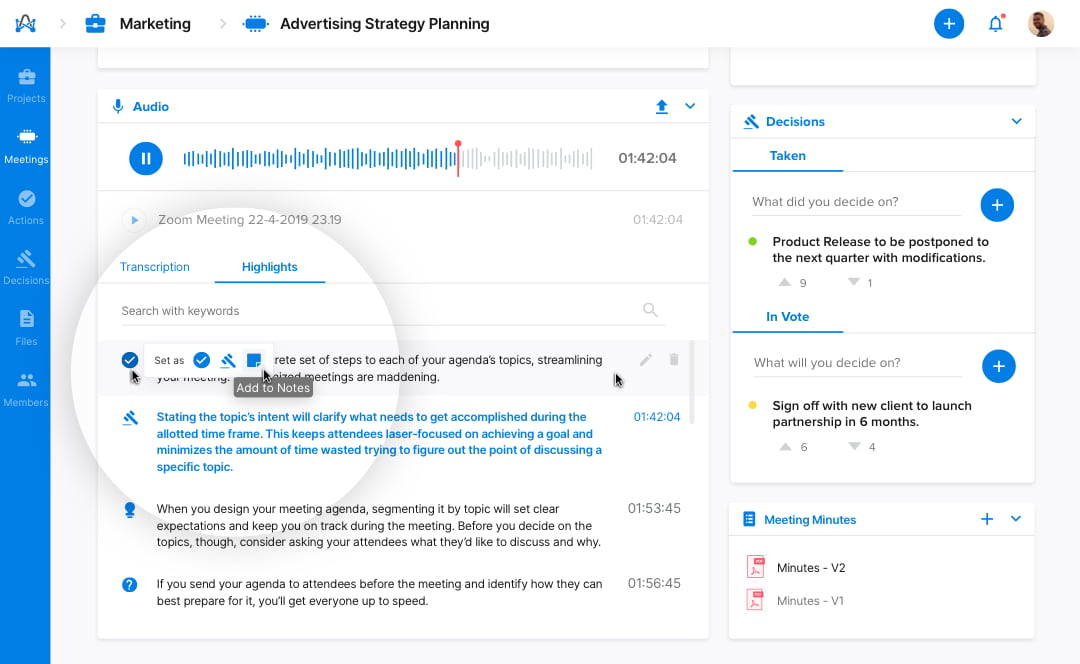
3. From Highlights, you can set certain items as actions, decisions, or add them to public notes. Selected items will directly be sent to the notes, actions, or decisions tile in the meeting room.
4. Delete, rename, or download audio transcription.
Note: Deleting audio files will remove all related highlights or transcriptions.
How to search and find specific keywords within your transcripts?
From the search bar found on either the 'Transcription' or 'Highlights' tab, meeting attendees can search the audio transcription or highlights for any keywords.
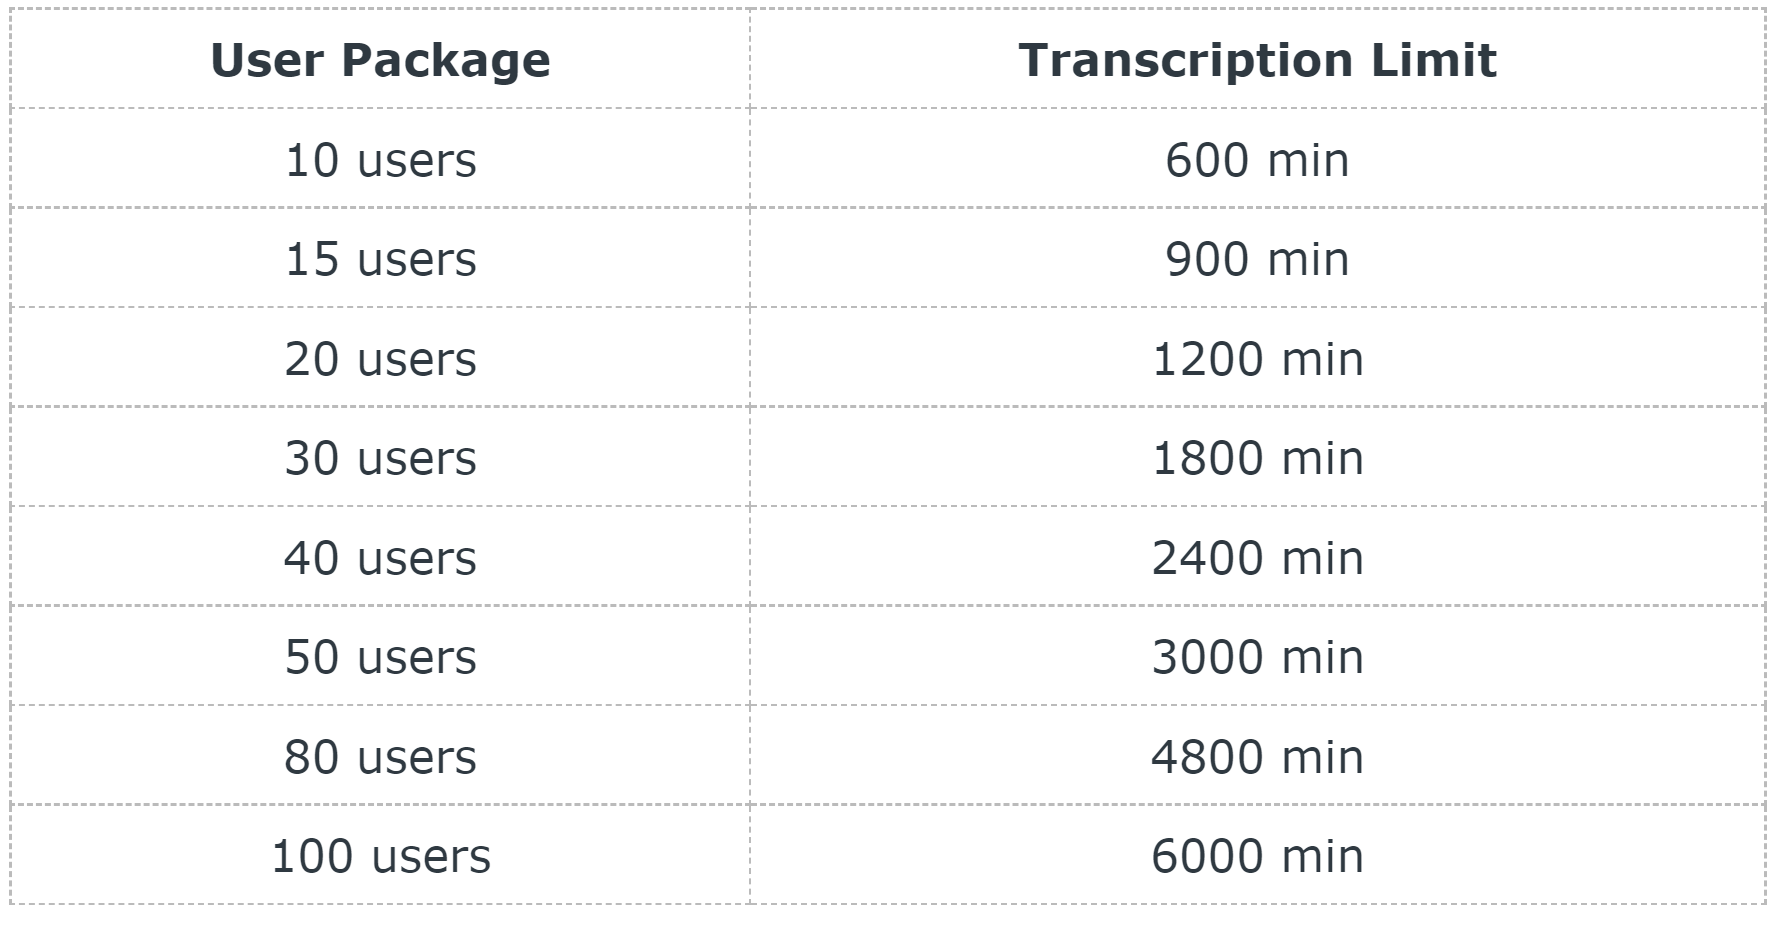
What are the current transcription plans and limits?
Audio transcription is limited, according to the user's current plan and package as follows:
You can always find your transcription indicator at the top right of the Transcription tab.