.svg)
Table of Content
How to Access the Booking Page Feature
How to Add an Availability to Your Booking Page
How to Update Your Public Booking Link
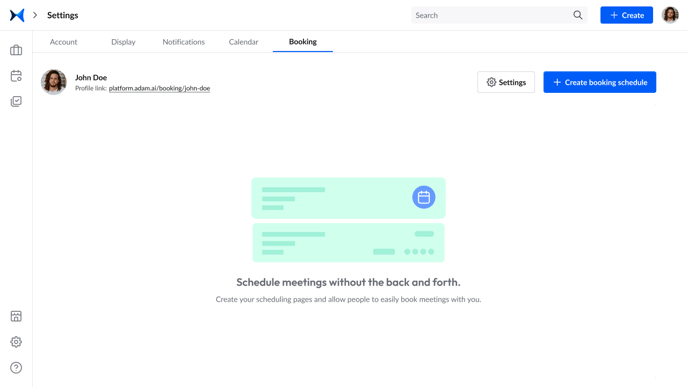
How to Access the Booking Page Feature
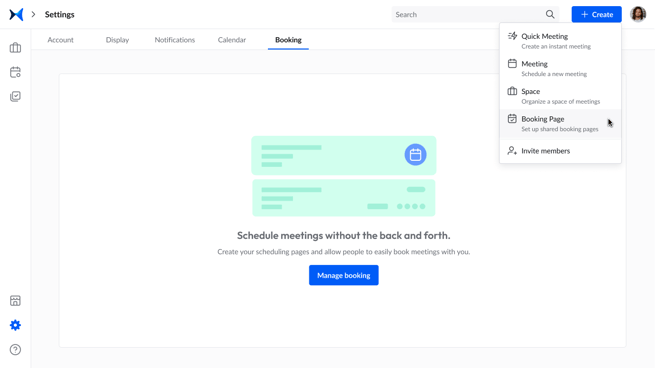
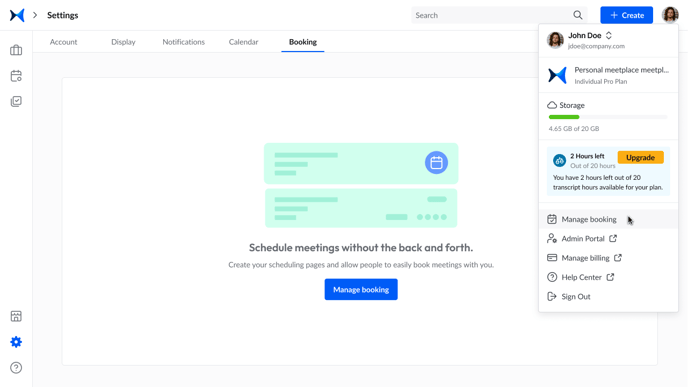
You have three options to access the Booking Page feature:
- The first option is to click on the gear icon on the side menu on the left to access the setting. Then, navigate to the "Booking" tab at the top, and click on "Create booking schedule."
- The second option is to click on the "+ Create" button on the upper right. Then, choose “Booking Page" from the dropdown list.
- The third option is to click on your profile icon. Then, choose "Manage Booking" from the dropdown list.
How to Create a Booking Page
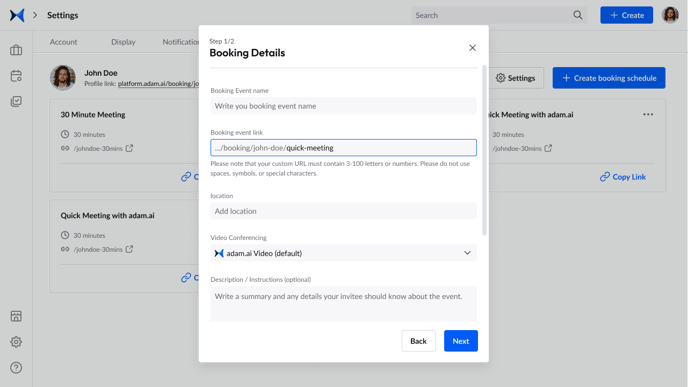
- Access the Booking Page feature using any of the above options.
- The first step is to fill in the form with booking details like the event name, location, and video-conferencing platform. Then, click "Next."
- The second step is to choose your booking availability and duration. Then, click "Create."

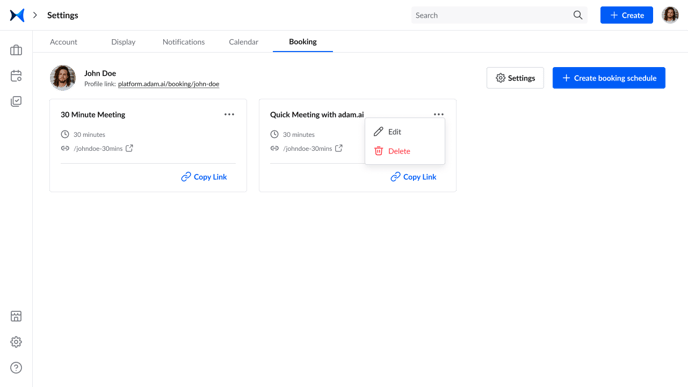
- A card will appear in your Booking Page with the options to copy, edit, or delete your booking link.
- Share the booking link with the concerned people. When they open the link, they’ll fill in their names and emails to book a meeting with you on adam.ai.
- The booked meeting appears as a meeting card on your “Meetings” page, which you can choose to either accept, decline, or cancel.
How to Add an Availability to Your Booking Page
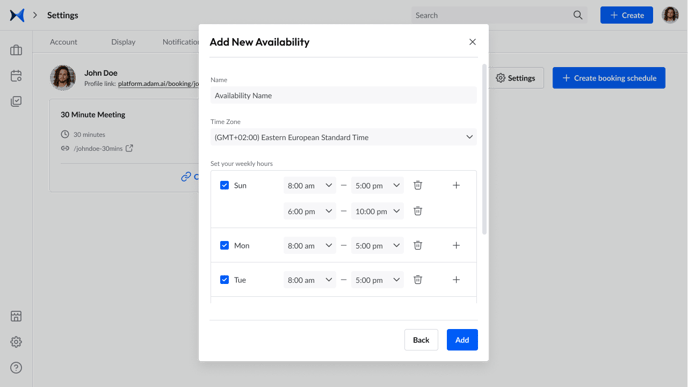
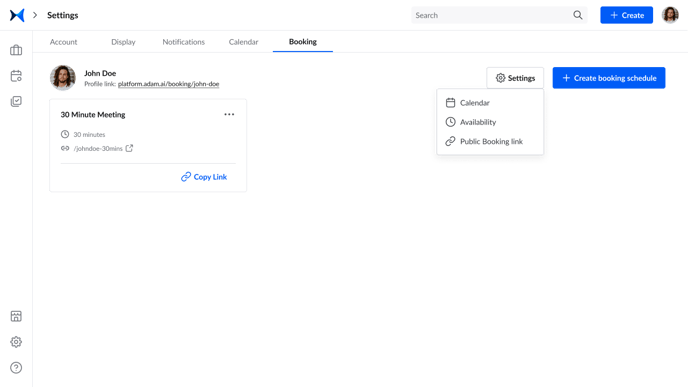
- In your Booking tab, click on "Settings" on the top right and then "Availability."
- Click on "Add Availability," fill in the form with the name, time zone, and your weekly hours, and the click "Add."
- You can choose to set an availability as default or duplicate, edit, or delete it.

How to Update Your Public Booking Link
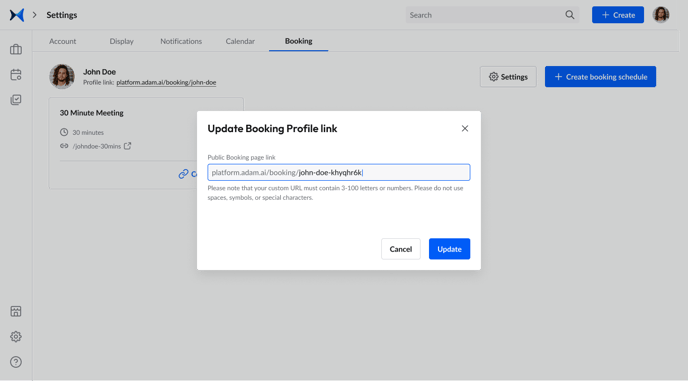
- In your Booking tab, click on "Settings" on the top right and then "Public Booking link."
- Edit your booking link, and then click "Update."
Tip: You can create as many booking pages as you need on adam.ai.
Related Articles
How to Create an Account on adam.ai
How to Connect Your Primary and Secondary Calendars to Your Account and Sync Meetings
How to Create and Manage a Meeting Space
How to Connect Your Account with Your Favorite Applications
How to Manage Your Meetplace Settings